How to Play Tennis: The Complete Beginner’s Guide (2025)

60
How to play tennis for beginners guide 2025 cover image
Cover image for the beginner’s guide on how to play tennis.

Tennis is one of the most exciting and rewarding sports you can learn—whether you want to play for fun, fitness, or future competition. As a beginner, it can feel overwhelming with all the rules, scoring terms, and techniques, but don’t worry—this guide breaks everything down in a simple, friendly way to help you get started with confidence.

By the end of this guide, you’ll know the essential rules, how scoring works, what equipment you need, and how to start playing your first real game.

Table of Contents

1. Introduction: Why Tennis Is a Great Sport to Start With

Tennis isn’t just a game—it’s a lifelong sport that improves your physical health, coordination, mental strength, and confidence. It’s suitable for all ages and fitness levels, and you can practice almost anywhere, from local courts to your own backyard.

Why tennis is perfect for beginners:

  • Improves full-body fitness – cardio, strength, flexibility, and balance

  • Boosts mental focus and discipline

  • Great for socializing and making new friends

  • Can be played casually or competitively

Beginner tennis player holding a racquet on the court for the first time
A young beginner learning tennis and holding a racquet for the first time.

If you’re just starting your tennis journey, this guide will help you build a solid foundation and avoid confusion—so stick with it till the end!


2. Tennis Basics & Equipment Beginners Need

Before stepping on the court, you need to know the basic equipment and why choosing the right beginner gear makes learning easier. The good news? You don’t need expensive equipment to start.

Essential Tennis Equipment:

Item Why You Need It
Tennis Racquet Your main tool—choose a beginner-friendly one
Tennis Balls Practice and match play
Tennis Shoes Designed for court movement & safety
Comfortable Clothing Allows easy movement
Water Bottle & Towel For hydration and comfort

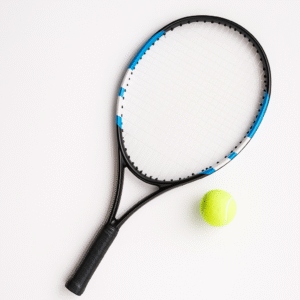
Choosing Your First Tennis Racquet (Beginner Tips)

The racquet you choose affects your control, power, and comfort. For beginners, the best racquet is one that is:

  • Lightweight (9–11 oz)

  • Oversized head (100–108 sq. inches) for a larger sweet spot

  • Medium grip size for comfort and injury prevention

Bold Tip: A light, oversized racquet helps beginners hit cleaner shots and learn faster.

🔍 Beginner Racquet Recommendations (Subtle Mentions)

  • Wilson Clash 100

  • Babolat Boost Aero

  • Head Ti.S6

(Affiliate links will be inserted later.)

Mini Product Box: Best Overall Beginner Racquet

Best for Beginners: Wilson Clash 100

Why we like it:
✔ Easy to control
✔ Comfortable for the arm
✔ Large sweet spot to reduce misses

Ideal for: Beginners who want fast improvement and comfort.

Tennis racquet and ball on a white background
A simple tennis racquet and ball placed on a white background.

Other Basic Gear Beginners Should Consider

  • Tennis shoes: Choose shoes designed for tennis—not running shoes—to avoid injury and slipping.

  • Tennis balls: Start with pressureless or beginner low-compression balls to learn control faster.

Bold Tip: Avoid using regular high-speed balls at first—they bounce fast and are harder to control.

3. Rules of the Game (Beginner-Friendly Breakdown)

Learning the basic rules will help you understand how the game works and feel confident stepping onto the court. Tennis can look complicated at first, but once you learn the flow of a point, a game, and a match, it becomes simple.

🎯 Objective of the Game

The goal in tennis is to hit the ball over the net and into your opponent’s court in a way that they cannot return it.

A point continues until:

  • The ball bounces twice on one side

  • A player hits the ball out of bounds

  • A player hits the net and it doesn’t go over

🤝 Singles vs. Doubles

Format Players Court Size
Singles 1 vs 1 Narrow court (inner sidelines)
Doubles 2 vs 2 Wider court (outer alleys included)

Bold Tip: If you’re a beginner, start with singles—it’s easier to focus on your movements and shots.

🔽 Basic Flow of a Tennis Point

  1. Serve starts the point

  2. Opponent returns the serve

  3. Rally continues until one player wins the point

❌ Faults Beginners Should Know

  • Fault: Serve lands outside the service box

  • Double Fault: Two failed serves → opponent wins the point

  • Foot Fault: Server steps on the baseline during serve


4. Tennis Scoring System (Explained Simply)

Tennis scoring confuses most beginners at first. Don’t worry—this section explains it in a simple way so you’ll finally “get it.”

🎾 Points System

Instead of counting 1, 2, 3, 4, tennis uses these terms:

Score Term Meaning
0 Love
1 point 15
2 points 30
3 points 40
4 points Game won

Example: If you score two points, the score is 30–Love.

Bold Memory Trick:
Think: 0–15–30–40–Game.
Just memorize that order—it becomes natural after a few matches.

🤝 Deuce + Advantage (Close Game Rule)

If both players reach 40–40, it’s called Deuce.

From there:

  • Win 1 point → Advantage

  • Win next point → Game won

If the player with Advantage loses the next point, it goes back to Deuce again.

🧱 How Games, Sets & Matches Work

Term What It Means
Game Smallest scoring unit
Set First to win 6 games (must win by 2)
Match Usually best of 3 sets

Example Match Format (Most Common)

  • Best of 3 Sets
    Win 2 sets → win the match.

5. Tennis Court Types & Surfaces (Which One Should Beginners Start On?)

The type of surface you play on affects how the ball bounces, how you move, and the style of play you’ll develop. Knowing the differences helps you adapt faster and choose the best court for your practice.

### Different Tennis Court Surfaces Explained

There are four main types of tennis courts used around the world, each offering a unique playing experience.


#### Hard Court: Best Surface for Beginners (Most Common in the US)

Hard courts are the most beginner-friendly and widely available surface in the United States. They provide a consistent bounce, making it easier to learn timing and control.

Characteristics:

  • Offers medium–fast speed and consistent bounce

  • Easy to move and learn different playing styles

  • Less physically demanding than clay or grass

Why it’s great for beginners:

  • Predictable ball bounce helps you learn proper footwork and timing

  • Most public courts in the US are hard courts, so access is easy

  • Balanced for developing both offense and defense

Bold Tip: Start training on hard courts to build solid fundamentals before switching to other surfaces.


#### Clay Court: Slower Pace & More Rally-Based

Clay courts are more common in Europe and Latin America, but some U.S. clubs have them too. Clay has a slower bounce and is great for developing stamina and consistency.

Characteristics:

  • Slow ball speed — more time to react

  • Higher bounce

  • Encourages long rallies and defensive play

Benefits for players:

  • Improves endurance and patience

  • Helps develop topspin and footwork

  • Encourages strategic play

Note: Footwork is harder on clay due to sliding, so it’s less ideal for complete beginners.


#### Grass Court: Fastest Surface & Low Bounce

Grass courts are the fastest surface, with low ball bounce and quick rallies. They’re less common due to maintenance costs.

Characteristics:

  • Very fast with low, unpredictable bounce

  • Points are shorter

  • Favors aggressive, serve-and-volley players

Best for:
Developing reflexes, fast decision-making, and net play.

Not ideal for beginners because the ball bounce is harder to judge.


#### Carpet or Synthetic Surface: Indoor Matches

Carpet courts are used mainly indoors and are less common for beginners. The bounce is faster than clay but softer on joints than hard courts.


Which Surface Should a Beginner Practice On?

Rank Surface Beginner Rating Why
✅ #1 Hard Court ★★★★★ Balanced, accessible, best for fundamentals
#2 Clay ★★★★☆ Great for strategy & stamina
#3 Grass ★★☆☆☆ Harder to adapt to
#4 Carpet ★★☆☆☆ Less common

Conclusion:
If you’re in the U.S., start with hard courts to build your foundation—it prepares you for all other surfaces.

6. Basic Tennis Techniques Every Beginner Should Learn

To enjoy tennis and improve quickly, you need to build strong fundamentals. Mastering the basic techniques early will help you develop proper form, avoid bad habits, and gain confidence on the court.

### Key Tennis Techniques for Beginners (With Simple Breakdown)

Below are the core skills every new player should focus on first.


#### The Forehand Stroke (Your First Consistent Weapon)

The forehand is usually the first stroke beginners learn and often becomes their strongest shot.

How to Perform a Forehand (Simple Steps):

  1. Start in ready position with racquet in front

  2. Turn your body sideways (non-dominant shoulder facing net)

  3. Low-to-high swing motion

  4. Make contact in front of your body

  5. Finish with follow-through over your opposite shoulder

Beginner Coaching Tips:

  • Use a relaxed grip, not tight

  • Aim for consistency over power

  • Keep your feet moving — don’t stand still during the swing

Bold Tip: Think “brush up the ball” to create natural topspin and reduce errors.


#### The Backhand Stroke (One-Handed vs. Two-Handed)

Most beginners struggle with the backhand, so learning the basics correctly early on makes a big difference.

Two-Handed Backhand (Best for Beginners):

  • More control and stability

  • Easier for returning fast balls

  • Helps with accuracy

One-Handed Backhand (More Advanced):

  • More reach and flexibility

  • Better for slice shots

  • Harder to master

Steps for a Beginner Two-Handed Backhand:

  1. Turn sideways

  2. Racquet back early

  3. Contact ball slightly in front of body

  4. Follow through across your shoulder


#### The Serve (The Most Important Shot in Tennis)

The serve starts every point, and learning a simple, reliable serve should be a beginner’s top priority.

Beginner Serve Checklist:

  • Use continental grip

  • Toss ball slightly in front of you

  • Keep your arm relaxed

  • Aim for 80% consistency, not power

Common Beginner Mistake:
Trying to hit powerful “ace-like” serves too early. Focus on control.


#### The Volley (For Net Play & Faster Points)

A volley is a shot hit before the ball bounces, usually near the net. It’s helpful for finishing points quickly.

Beginner Volley Tips:

  • Keep the racquet head up

  • Short punch motion — don’t swing

  • Stay on your toes for quick reactions

Bold Tip: Practice forehand and backhand volleys early—it helps build confidence near the net.


#### The Slice (Control Shot for Defense & Variety)

A slice isn’t mandatory for day one, but learning it early helps control the game.

Why learn the slice:

  • Slows the pace

  • Adds variation

  • Useful for defense and approach shots


Grip Guide for Beginners

Choosing the right grip helps you learn faster and avoid wrist strain.

Shot Recommended Beginner Grip
Forehand Semi-Western or Eastern
Backhand Two-Handed Backhand Grip
Serve Continental Grip
Volleys Continental Grip

🎾 Friendly Practice Focus for Week 1–2

  • Build consistent forehand and backhand

  • Practice 10–15 minutes of serve toss only

  • Learn basic volley form slowly


7. Footwork & Movement (The Foundation of Every Good Player)

Your strokes matter, but footwork is what makes a tennis player truly effective. Good movement helps you reach the ball early, maintain balance, and hit cleaner shots. Most beginners skip this step—but the ones who learn it improve much faster.

### Why Footwork Matters in Tennis

  • Improves timing and shot preparation

  • Reduces unforced errors

  • Helps maintain balance and control

  • Saves energy with efficient movement

Bold Tip: Hit the ball with your feet—not your hands.
Meaning: Position your body correctly first, and the shot becomes easier.


#### Basic Footwork Techniques for Beginners

1. Ready Position

Always start with your knees slightly bent, racquet in front, and on your toes.

2. Split Step

A small hop taken just before your opponent hits the ball to prepare for quick movement.

3. Side Shuffles (Lateral Movement)

Move sideways instead of crossing feet—faster and more stable.

4. Small Adjustment Steps

Take tiny steps before hitting the ball to find the perfect contact point.


#### Footwork Mistakes Beginners Should Avoid

  • Standing flat-footed

  • Running through the shot instead of stopping and planting

  • Using large steps instead of small adjustment steps

  • Not returning to center after each shot


### Simple Footwork Routine (5 Minutes Before Practice)

  • 1 min jump rope or light jog

  • 1 min split-step practice

  • 1 min lateral shuffles

  • 1 min forward & backward sprints

  • 1 min shadow swings with footwork


8. Essential Beginner Drills (With Beginner & Intermediate Levels)

These drills help build consistency, accuracy, footwork, and confidence. You can practice many of them alone or with a partner.


### Forehand & Backhand Consistency Drill

Beginner Version:

  • Rally short distance (service box to service box)

  • Aim for 10 clean forehands and 10 clean backhands in a row

  • Focus on control, not power

Intermediate Version:

  • Rally from baseline with topspin

  • Aim for 20–30 shot rallies

  • Add directional targets (cross-court + down the line)

Bold Tip: Record your rally count. Improving numbers builds motivation.


### Serve Accuracy Drill

Beginner Version:

  • Stand closer to the service line than usual

  • Try hitting 10 serves into the service box

  • Focus on toss control only

Intermediate Version:

  • Move back to baseline

  • Aim for 6/10 successful serves

  • Practice serving to both sides: “T” and “Wide”

Visual Suggestion: Add graphic showing target zones inside the service box.


### Wall Practice Drill (Solo)

Perfect for days when you don’t have a partner.

Beginner Version:

  • Stand 10–12 ft away

  • Hit 50 controlled shots without missing

Intermediate Version:

  • Add footwork (left–right movement)

  • Alternate forehand/backhand shots


### Volley Reflex Drill

Beginner Version:

  • Stand a few feet from the net

  • Coach/partner tosses balls gently

  • Short “punch” volleys only, no big swings

Intermediate Version:

  • Faster feed

  • Add backhand volleys

  • Aim to keep 70%+ balls in play


### Movement + Recovery Drill

Beginner Version:

Place 4 cones: left, right, front, back
– Move to cone → shadow swing → return to center

Intermediate Version:

Same drill, but:
– Add real ball feed
– Increase speed & add split step

Bold Tip: Always return to center. Beginners forget this 80% of the time.

9. Common Beginner Mistakes (and How to Fix Them Fast)

Every tennis player makes mistakes in the beginning — it’s part of the learning process. What matters is fixing them early so they don’t become bad habits. Below are the most common beginner errors and simple solutions to correct them quickly.


### Mistake #1: Focusing on Power Instead of Control

Many beginners try to hit the ball as hard as possible, thinking it makes them “look good.” In reality, this leads to errors, frustration, and slow progress.

How to Fix It:

  • Aim for 70–80% power — prioritize clean contact

  • Practice slower swings to build consistency

  • Count how many balls you can hit in a row (consistency > speed)

Bold Tip: Consistency wins games — not power.


### Mistake #2: Standing Still and Hitting Flat-Footed

If your feet stop moving, your timing breaks down and your shots become stiff.

Fix:
Use the split step before your opponent hits, stay light on your toes, and take small steps to adjust your position.

Visual Suggestion: Show “split step → move → hit → recover” footwork graphic.


### Mistake #3: Holding the Racquet Too Tight

Gripping too tightly causes tension in your wrist and arm, reducing control and causing fatigue.

Fix:
Maintain a relaxed grip — imagine holding a small bird: firm enough not to drop it, gentle enough not to crush it.


### Mistake #4: Hitting the Ball Too Close to the Body

If the ball comes too close, you won’t generate proper swing or power.

Fix:
Move your feet to the ball and make contact in front of your body with enough space between your hips and the ball.


### Mistake #5: Ignoring Technique on the Serve

Beginners usually rush the serve, copying advanced players’ fast motions.

Fix:
Slow down and focus only on:

  • Toss height

  • Toss placement (slightly forward)

  • Balanced stance

Bold Tip: A controlled serve with 60% power is better than a wild 100% effort.


### Mistake #6: Not Returning to the Ready Position

Many players watch their shot instead of preparing for the next one — a common beginner habit.

Fix:
After every shot, return to the center (or “recovery position”) with your racquet up and ready.


### Mistake #7: Using Running Shoes Instead of Tennis Shoes

This leads to slipping, poor movement, and higher injury risk.

Fix:
Wear tennis-specific shoes for support, grip, and lateral movement.


### Mistake #8: Playing Only Matches and Not Practicing Drills

Matches are fun, but if you only play games, improvement slows down.

Fix:
Split your training:

  • 70% drills & practice

  • 30% match play


### Mistake #9: Holding the Racquet Wrong (Wrong Grip)

Using the wrong grip results in weak shots and wrist strain.

Fix:
Learn the 3 basic beginner grips:

  • Forehand: Eastern or Semi-Western

  • Backhand: Two-handed

  • Serve/Volley: Continental


### Mistake #10: Expecting Fast Improvement and Getting Frustrated

Many beginners quit early because improvement wasn’t “fast enough.”

Fix:
Set small weekly goals (e.g., 10-rally target, 6/10 serves in) and celebrate progress.

Motivation Reminder: Every advanced player was once a beginner. Your pace is fine.

10. How to Practice Effectively (Beginner Training Framework)

Improvement in tennis doesn’t come from playing random matches — it comes from structured practice. A good training routine helps you build skills faster, stay motivated, and avoid developing bad habits.

Whether you practice alone, with a partner, or with a coach, use this simple framework to get the most out of every session.

### The 3-Part Practice Formula for Beginners

Every tennis practice should include these three elements:

Practice Segment Duration Purpose
Warm-Up 5–10 mins Prepare body & prevent injury
Skill Development (Drills) 30–40 mins Build technique & consistency
Match Play / Games 15–20 mins Apply skills in real play

Bold Tip: The secret to improving faster is spending more time on drills, not matches.


#### Warm-Up Routine (5–10 Minutes)

A good warm-up improves flexibility, coordination, and stroke rhythm.

Recommended Warm-Up Sequence:

  1. Light jog or jump rope – 2 mins

  2. Dynamic stretches – 2 mins

  3. Shadow swings (forehand & backhand) – 2 mins

  4. Mini rally inside service boxes – 3–4 mins


#### Skill Drills (30–40 Minutes)

This is where actual improvement happens. Focus on one or two skills per session so you don’t overload your mind.

Example weekly drill schedule:

Day Main Focus
Mon Forehand consistency
Wed Backhand + footwork
Fri Serve + return practice

#### Match Play (15–20 Minutes)

This can be casual or competitive.

Why this matters:

  • Helps you apply techniques under pressure

  • Develops real tennis instincts

  • Builds confidence

Balanced Tip: Don’t skip drills just to “jump into playing” — that slows long-term progress.


### How Often Should Beginners Practice?

Frequency Progress Speed
1 day/week Slow progress
2 days/week Noticeable improvement
3 days/week Fast improvement (recommended)

If possible, aim for 3 practice days per week with at least one being structured drills.


### Solo Practice Options (If You Don’t Have a Partner)

No partner? No problem. You can still improve.

  • Wall practice

  • Serve practice (toss + placement)

  • Shadow swings + footwork drills

  • Ball machine (if available at club)

Bold Tip: Record yourself once a week — seeing your strokes helps correct mistakes faster.


### Track Your Progress (This Keeps You Motivated)

Measuring progress builds confidence and keeps you motivated.

Track simple metrics like:

  • Longest rally count

  • Serve accuracy %

  • Number of errors per set

  • Fitness improvements

Create a simple tracker in your phone or notebook.


11. Best Tennis Gear for Beginners (What to Buy First)

Choosing the right tennis gear can make a big difference in how quickly you improve, how comfortable you feel on the court, and how much you enjoy the game. The good news is—you don’t need expensive equipment to start. Below are the best beginner-friendly gear options that offer great value, comfort, and control.


🎾 Best Overall Tennis Racquet for Beginners

Wilson Clash 100 – Best Overall Pick

A highly beginner-friendly racquet that offers excellent control, a large sweet spot, and great comfort for the arm. Helps new players learn proper technique faster.

Pros:

  • Beginner-friendly with excellent control

  • Arm-friendly (reduces vibration)

  • Large sweet spot for cleaner shots

Cons:

  • Slightly higher price compared to budget racquets

Best For:
Beginners who want a racquet that will support them from first lesson to intermediate level without needing an upgrade soon.

Why We Recommend It:
The Wilson Clash 100 is one of the most comfortable and reliable racquets for beginners. It helps build confidence, clean contact, and proper technique from day one—making progress faster and more enjoyable.


💰 Best Budget Tennis Racquet for Beginners ($50–$99 Range)

Head Ti. Conquest – Best Budget Pick

An affordable yet reliable racquet that offers great value for beginners. Lightweight, easy to handle, and ideal for recreational and early-training use.

Pros:

  • Budget-friendly and good value for beginners

  • Lightweight and easy to swing

  • Comfortable and forgiving for new players

Cons:

  • Not as durable as higher-end racquets

Best For:
Beginners on a budget who want a quality racquet for practice, casual play, or starting lessons without a big investment.

Why We Recommend It:
For under $100, the Head Ti. Conquest delivers excellent comfort and control for new players. It’s the ideal “starter racquet” for those who want quality without overspending.


🛡️ Most Arm-Friendly Racquet for Beginners (Elbow & Wrist Safe)

Head Ti.S6 – Best Arm-Friendly Pick

A lightweight racquet designed to reduce strain on the arm, wrist, and elbow—perfect for beginners who want comfort and injury-free learning.

Pros:

  • Extremely lightweight and easy to swing

  • Very arm-friendly (ideal for avoiding tennis elbow)

  • Large head size for better shot contact

Cons:

  • Players may outgrow it faster as skills improve

Best For:
Beginners who want a light, comfortable racquet that minimizes impact and strain—particularly older beginners or those with sensitive wrists/elbows.

Why We Recommend It:
The Head Ti.S6 is one of the most comfortable racquets for complete beginners. If you’re worried about joint pain or want maximum comfort while learning, this is the safest choice.

🧒 Best Lightweight Racquet for Kids & Teens

Babolat Boost Aero – Best for Kids/Teens Learning Tennis

A lightweight racquet that’s easy for junior players to control. Helps young players learn technique with less effort and more confidence.

Pros:

  • Lightweight and easy to swing

  • Great for kids, teens, or smaller beginners

  • Comfortable and beginner-friendly

Cons:

  • Not ideal for advanced junior competition play

Best For:
Kids and teens (ages 9–16) who are learning tennis and need a light racquet that supports proper technique.

Why We Recommend It:
The Babolat Boost Aero helps young beginners build skills without feeling tired or overwhelmed. It promotes good technique from an early stage.


👩 Best Tennis Racquet for Women Beginners

Yonex EZone 100L – Best for Women Beginners

A lightweight, easy-to-handle racquet that offers a balance of power, control, and comfort—perfect for women starting tennis or returning after a long break.

Pros:

  • Lightweight and comfortable for longer play

  • Easy to generate power with less effort

  • Great control and stability

Cons:

  • Slightly pricier than basic beginner racquets

Best For:
Women beginners who want a racquet that feels comfortable, easy to swing, and helps improve quickly.

Why We Recommend It:
The Yonex EZone 100L supports natural swing motion and helps women players hit cleaner, stronger shots with less arm fatigue.


👟 Best Tennis Shoes for Beginners

Wearing the right shoes is essential for safety and performance. Avoid running shoes—tennis shoes provide proper support for side-to-side movement.

Recommended Beginner Options:

  • ASICS Gel-Dedicate – Comfortable, supportive, and beginner-friendly

  • Nike Court Lite 2 – Lightweight and stable for new players


🟡 Best Tennis Balls for Beginners

Beginner tennis balls are designed to bounce lower and slower, giving learners more control.

Recommended Ball Types:

  • Beginner Low-Compression Balls (ideal for practice)

  • Pressureless Balls (great for long-term use & training drills)


🧰 Beginner Tennis Starter Pack (Everything You Need)

Here’s a simple checklist of what a beginner should buy first—no extras, no overwhelm:

✅ 1 Beginner tennis racquet
✅ 1 Pair of tennis shoes
✅ 3–6 beginner tennis balls
✅ Water bottle & towel
✅ Comfortable sportswear

12. Final Tips & Next Steps for Beginner Tennis Players

Starting tennis is exciting, and the key to improving is staying consistent, patient, and focused on building strong fundamentals. You don’t need perfect technique overnight — small progress each week adds up quickly.

Beginner Success Tips

  • Practice consistently (2–3 times per week is ideal)

  • Focus on form and control before power

  • Combine drills + match play for faster improvement

  • Track progress (rally count, serve accuracy, fitness)

  • Don’t compare yourself to advanced players — compare yourself to last month’s YOU

Motivation: Tennis is a journey. Enjoy the process and celebrate small wins.


🧭 What to Do After Reading This Guide

Here’s how to move forward strategically:

Week 1–2:

  • Learn basic grips, forehand, and backhand

  • Practice with low-compression balls

Week 3–4:

  • Add serving practice and simple footwork drills

  • Play short practice matches

After 1 Month:

  • Join group lessons or play with others at your level

  • Gradually switch to standard tennis balls


🏁 Conclusion

Learning tennis as a beginner should feel fun—not overwhelming. By starting with the right gear, practicing consistently, and focusing on proper technique, you’ll build a strong foundation and enjoy faster progress on the court.

You don’t need the most expensive equipment to start. Just choose the right beginner gear, keep practicing, and enjoy the journey. Every pro was once a beginner — and your tennis story starts now.


❓ Frequently Asked Questions (FAQs)

1. How often should a beginner practice tennis?

Practicing 2–3 times per week is ideal for steady improvement. Mix drills and match play for best results.

2. What type of tennis balls should beginners use?

Begin with low-compression or pressureless balls for better control and learning.

3. Should I take tennis lessons as a beginner?

Lessons are not mandatory, but one or two coaching sessions can help correct early mistakes and speed up progress.

4. How long does it take to get good at tennis?

With consistent practice, most beginners see noticeable improvement in 6–8 weeks.

5. Can I learn tennis at any age?

Absolutely — tennis is a lifelong sport. Kids, teens, adults, and even seniors can learn and enjoy playing.

LEAVE A REPLY

Please enter your comment!
Please enter your name here